We interview Mélanie, a multi-talented creative who not only flips vintage furniture, but also sews beautiful cloth baskets for decluttering and organisation in the home, along with growing her own fruit and vegetables (and more). She shares with us her process for transforming a dated Queen Anne style chest of drawers.

Please tell us a little about you and your business. We’d love to hear about how long you’ve been involved with what you’re doing and what inspired you to take this career path and when.
I hate waste and I always liked the saying by French chemist Antoine Lavoisier who said: 'Nothing is lost, nothing is created, everything is transformed'. I like to believe that there are many easy things we can do before throwing something we do not have any use around the house anymore. Like asking ourselves can this be gifted, sold, repaired, restored, repurposed, donated or recycled? There are really many ways to reduce waste. So because of this, upcycling has been in my life for quite a while even if I only started flipping furniture more ‘seriously’ since May 2022. I still consider myself as a newbie as I learn every day and give preloved furniture new life only in my spare time.
Many years ago when I moved to my first apartment with only a very tight budget to furnish it, my grand-mother gave me a small armchair she didn’t need anymore. I changed the outdated fabric - without knowing what I was doing, so to be honest the result was not that impressive but I loved it - and that was officially my first upcycling project even if I did very little to transform it.
Then when I moved to Australia (I’m originally from Switzerland) I was amazed to see that council clean-ups were a thing here and the amount of good stuff that was thrown on the kerbside every month (if not every week!) that could easily have been donated instead of being crushed. In 2005 I collected my first small cupboard to use as a pantry in my kitchen because storage space was very limited. And then another cupboard, and a dresser and another one, and a buffet & hutch, and an armchair, a phone table, some bedside tables … What I didn’t need I started selling on eBay after giving them a lick of paint. Was I good at it? Not really but I really enjoyed the process as it was a great way to learn, make mistakes, rescue those beautiful pieces and even get paid a few dollars for it, which was great too.
After another house move, no upcycling for several years as I didn’t have the time or the space for it (or at least that’s what I told myself) but then in 2021 I decided to finish 1 project around the house each month. The first one was finishing to upholster the broken chair I collected 8 years earlier and that followed me in three house moves … It was already repaired and painted, I just needed to choose the right fabric and start upholstering it. By then it was clearly time to stop procrastinating any longer! While doing it, it reminded me how much I used to LOVE revamping discarded and unwanted furniture.
The next project to tackle was to renovate a room downstairs … And do something with the ugly chest of drawers that had seen better days. So, at first it was only for the house.
But one day I found a beautiful Queen Anne dressing table that just needed a little love … And a few months later I saw a French Provincial chair on the kerbside that I simply couldn’t let go to landfill. I revamped them both and shared the process on my Instagram account. People loved it and it gave me the confidence to keep going. It still early days but I haven’t stopped since then.
How long have you been using Gilly’s products and how did you first come across them?
In May 2022, after giving that beautiful dressing table a makeover I wanted to add a protective coat for extra durability on the finished piece without using harsh chemicals found in most clear top coats. After a bit of research I found the clear Cabinet Makers Wax at Bunnings, bought it and tried it straight away. It was exactly what I was looking for. I also needed a scented wax to give a fresh smell to the drawers while nourishing the old and dry timber and the Rose Cream Polish was perfect for that. I’ve been using these products since then.
Is there any particular product you prefer to work with and if so, could you explain why?
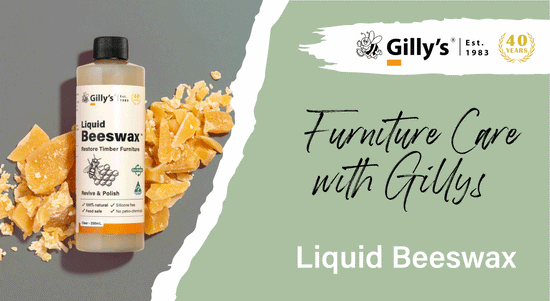
For my latest project, I started using the Liquid Beeswax and was really impressed by the result. It was so easy to use, the citrus smell is amazing and the best part is that it is a 100% natural product and a small quantity goes a long way. The Cream Polish is also one of my favourites, perfect for drawers as it leaves a fresh smell which is always great for vintage pieces!
Could you tell us about what you are working on right now and give us a step by step guide on how you are making it. How you are using the particular Gilly’s product(s) that you have chosen for the project? Please feel free to include other manufacturer’s products that you use in the process. We love to hear about different techniques.
I’ve found this beautiful Queen Anne tallboy for free on Facebook Marketplace. This piece was stunning to start with but was a bit dated and needed a little love. The uneven wood tones and the red stain definitely needed to be toned down, so here is what I’ve done to modernise it a little bit. My process below:
Preparation
Remove the hardware. Vacuum + clean with soap and water => to remove dust and grease and to make sure the paint will adhere well and stay on for years. Rinse + dry. Scuff sand the tallboy + top drawer to allow paint to stick to the surface. Prime any part that won’t be whitewashed with stain blocker to avoid any bleed through. Smooth out paint in between coats with fine grit sanding pad
Painting
Paint 1st layer. Smooth out surface with sanding pad + wipe back dust before applying second coat. Repeat same process for 2nd and 3rd coat. Sand parts that will be left bear wood or paint washed => sanding increments: 80, 120, 240. Wipe dust. Whitewash front of the 4 drawers => 1/10 paint + 9/10 water to lighten the piece and tone down the orange wood. Wipe excess with a lint-free rag. I applied a second coat for a thicker white wash look.
Waxing
Let it dry before applying the Cabinet Makers Wax with fine steel wool (perfect to close the pores of the wood after the paint wash and gently smooth the surface)
Apply Liquid Beeswax to the inside panels of drawers

Apply small amount of Carnauba Polish over the painted piece with a round brush then wipe any excess with a clean rag
Apply Rose Cream Polish for that clean, fresh smell => side + back of drawers
Finishing Touches
Apply stick & peel wallpaper => bottom of drawers

Clean hardware
Boil water in old pot (used only for that, not for cooking!) + a generous amount of baking soda. Let it simmer for at least 15 minutes then scrub each handle with fine steel wool. Install clean hardware

Final Step
Stage it and take photos! 😊
Do you have any tips and tricks pertaining to Gilly’s products that we haven’t included in our own material? We often have people contacting us with some really innovative uses of our products!
I usually follow the very clear instructions on the products so I don’t really have any tricks to share. And I also find the tips on the Gilly’s website very useful.
Check out Mélanie's amazing projects here and here! Find her beautiful handmade baskets on Instagram and purchase on her website.